This is where warehouse(s) are created and configured. This is the main view of this page

-
–  This will allow you edit the properties or view the warehouse.
-
–  This will delete the warehouse
-
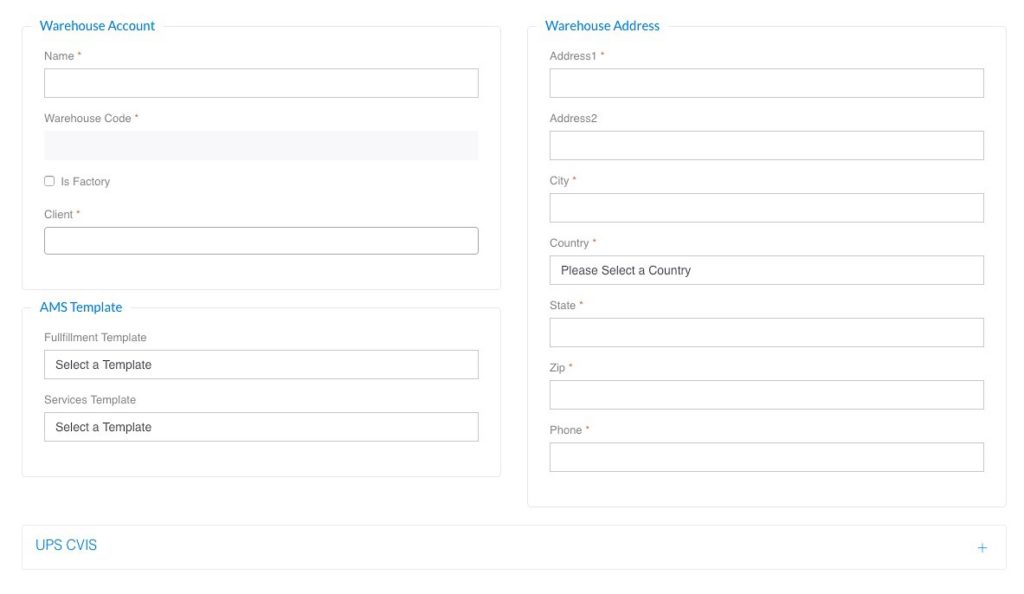
–  This will open a new window for you to create a new warehouse as showed below:

-
– Name: Fill in the name of the warehouse that best identifies its location
-
– Warehouse Code: This is auto generated code that identified the warehouse
-
– Is Factory: This is used to identify whether the warehouse as a factory or not. Note that if this box is checked, it will be used in FMS thus will not allow you to use it in SMS as a ship from location.
-
– AMS Template: When invoice template(s) are crated in the Accounting Management System (AMS), they appear here for the user to assign to a warehouse.
-
– Client: this where you associate the client that will use the warehouse
-
– Warehouse Address: This is the address of the warehouse. It is very important that you enter the correct address as it will be used to calculate the postage on the shipping labels.
-
– UPS CVIS: this is not required but if your UPS rep gives you the information inside the configuration, you can enable this feature. This represents an agent scan which is approved by Amazon. This only applies to shipments from UPS with tracking numbers that starts with 1Z. Checking the enable box will make I required.
WMS
a.1 Configuration – Location
a.2 Configuration – Vendor
a.3 Configuration – Warehouse
b. Cycle Count Process
c. Inter Warehouse Transfer
d. Inventory Move Log
e. Inventory Product
f. Inventory Summary
g. PO Process
h. RMA Process
[Table of Contents]