Channel Product
If you are using the channels API to download and upload tracking numbers, it is important that you add you store (Marketing Channel) under the System Settings > Channel View/Setup before doing this step. Then you MUST set and map your marketing SKU correctly following the steps below.
Note that although your marketing SKU can be the same as your inventory SKU, its not always have to be the same. Understanding the differences will help make this process easy for you.
Tips:
Best practice is to use the same SKU on all market places
-
– For Amazon its the “Seller SKU“
-
– For eBay its the “Custom Label“
-
– For Walmart its the “SKU“
Once you identify your marketing SKU(s), proceed to the Basic item Configurations.
This table has a relationship with the “Inventory Summary “from WMS/MMS and the “Ship Station” from SMS. The main page looks like what you see below:

-
– Update FC Mode: This only applies to Amazon channel. You can bulk switch items from FBM (fulfilled by Marchant) to FBA (Fulfillment by Amazon) by checking the box next to the items you want to change. Note that this will not change anything on your market store (Amazon) for now, but it will pull the inventory quantity you have in Amazon.
-
– Map Channel Store: Since each product is mapped to a specific channel store, you can bulk map your items using this function by checking the box next to the items you want to map.
-
– Import: You can use this to add new items or update the content of existing items. If you want to see and update the existing data, be sure to click on the “Include Existing SKU’s” before downloading the template. Note that any changes made to the exported data and loaded back into the system will update the info for that record. Therefore, if you just want to add new items, do not check that box when you download the template.
-
– Export: This will export the products you check and properties into excel
-
– Channel Sync: This will either say “True”- Meaning data is being sent to the channel based on your Cannel settings or “False” – meaning data is NOT being sent to the channel for various reason. go into the item and click on “Product’s Custom Fields” for error message. This sync happens from Monday – Friday at 11:30pm excluding weekends. Thus, if you add your items after 11:30 on Friday into Monday, not will not be updated until Monday night at 11:30pm.
-
–  This will allow you edit the properties or view the product.
-
–  This will delete the product
-
– This will open a new window for you to create a new product as showed below:

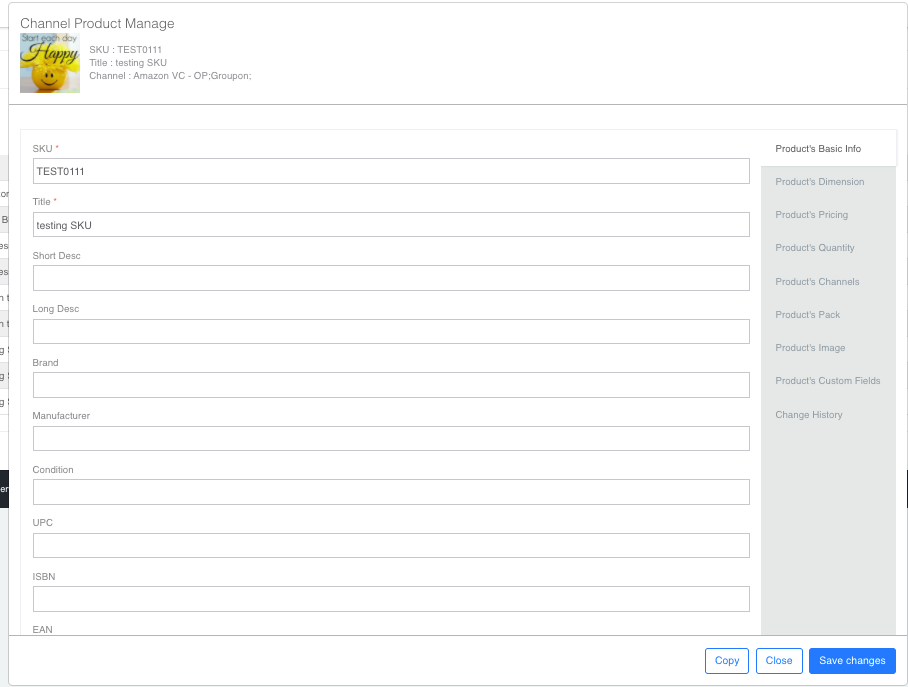
This is the main page, the right of the page will have all the different settings that you can set up for the marketing/channel SKU. For now, you are ONLY required to fill in the following basic information to get started.
Product’s Basic Info
-
– SKU: This the to match EXACTLY as the SKU you have on your channel. If there is even a space difference, order will not download for the item nor will there be a product sync
-
– Title: This can be what every you want, its strongly recommended that you use the same title as you have it on your channel store
Product’s Dimension
-
– Fill in the dimensions for the item to the left, the case info on the right is optional
Product’s Channel
-
– Move the channel from left to right, this will map the product to that channel and allow the orders and inventory to sync for that channel
-
– Move the channel from Right to Left, this will remove the mapping and stop the orders and inventory from syncing for that channel
Product’s Pack
-
– This is where you select the inventory items that the warehouse will pick and ship if your customer orders the item from your channel. It is therefore very important that you select the correct Inventory SKU and appropriate Qty to be picked and shipped. The Qty needs to be what the warehouse will pick and ship if a customer orders 1 item. It is very important that you enter the correct quantity here.
Product’s Custom Fields
-
– Depending on the channel, this is how you will see if a product is synced with that channel or not. You will notice ID’s from the actual channel to indicate where the product matched to the channel or not. Note that this is ONLY for a channel that has inventory sync activate. Otherwise, you can ignore this menu as its not required for the process to work.
-
– Status: The default for this is “Active”, if you dont want any channel sync for the product like update inventory into the channel, you can make it “In Active” for that channel. This will not affect order downloads
-
– For eBay, you will need to enter the “Item ID” for any Inventory sync to happen for that product. Note, leaving it blank will not affect order downloads but it will not update inventory back to the channel. To get this value, you can do one of the following:
-
a – From “Seller Hub” the “item Id” is next to the Title as showed on this screen shot: https://www.screencast.com/t/4aDXoNhlYx1
-
b – From “Seller Hub”, click on “Download” to get the data in excel format as showed here: https://www.screencast.com/t/TMkkzvIEjsL
Once all the basic settings above are done for the SKU, click on Save.
MMS
a. Inventory Product
