This is where you can auto sync the market place store with Smart Center so that SMS, WMS, MMS and CMS can work via the API.

-
– Client: Depending on how many clients you have access to, this will be a drop down for you to select. It’s important that you select the appropriate client to add a market place for.
-
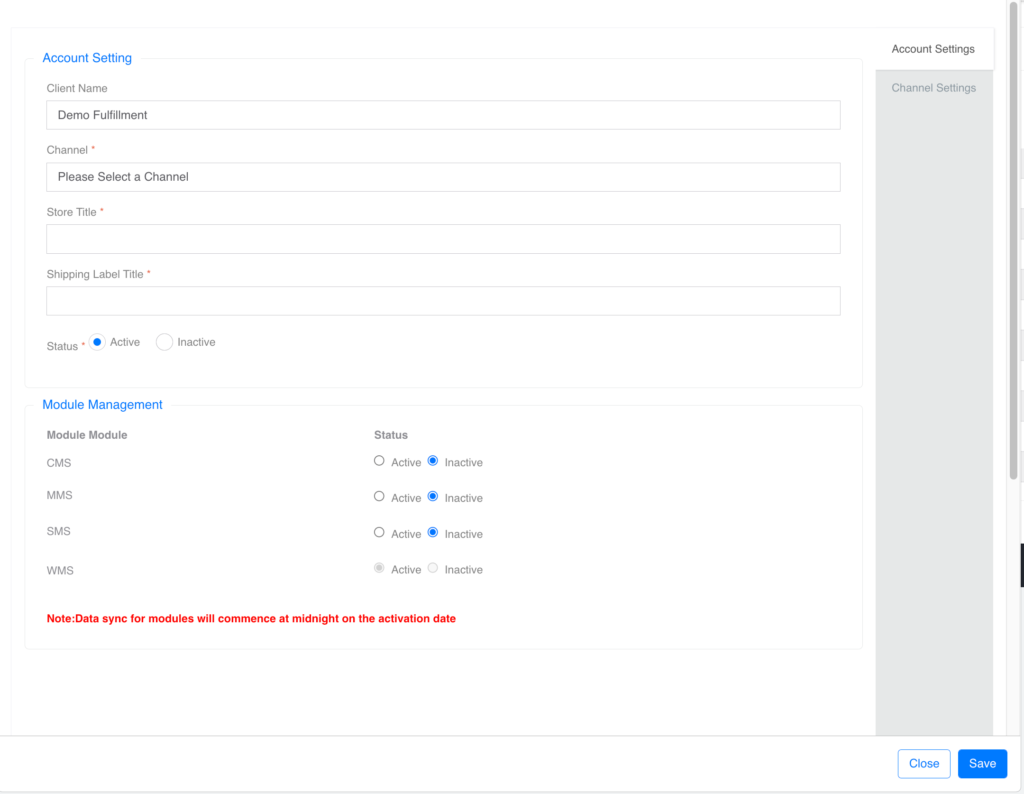
 This will open a new window for you to add the market place you want to add as showed below:
-
– Account Settings: This tab needs the following configurations before you can proceed
-
– Channel: Select the store/marketplace you want to add. Note, the store/marketplace you want will determine the rest of the settings.
-
– Store Title: This can be the name of the marketplace you want to add, it’s totally up to you on what you want to use to identify the store
-
– Shipping Label Title: This can also be whatever you want, it will be displayed on the header of the shipping label so the customers will know where the package came from. The max characters for this field is 30.
-
Module Management:
-
– CMS: You can leave this setting inactive, it has no function
-
– MMS: This needs to be active for orders to be downloaded. If you want the system to auto update your inventory, check the “Update Inventory” box
-
– SMS: This is what controls the communication of the orders between the channel and the system. This needs to be Active for orders to flow back and forth
-
– WMS: by default this is always active if you have the WMS module
-
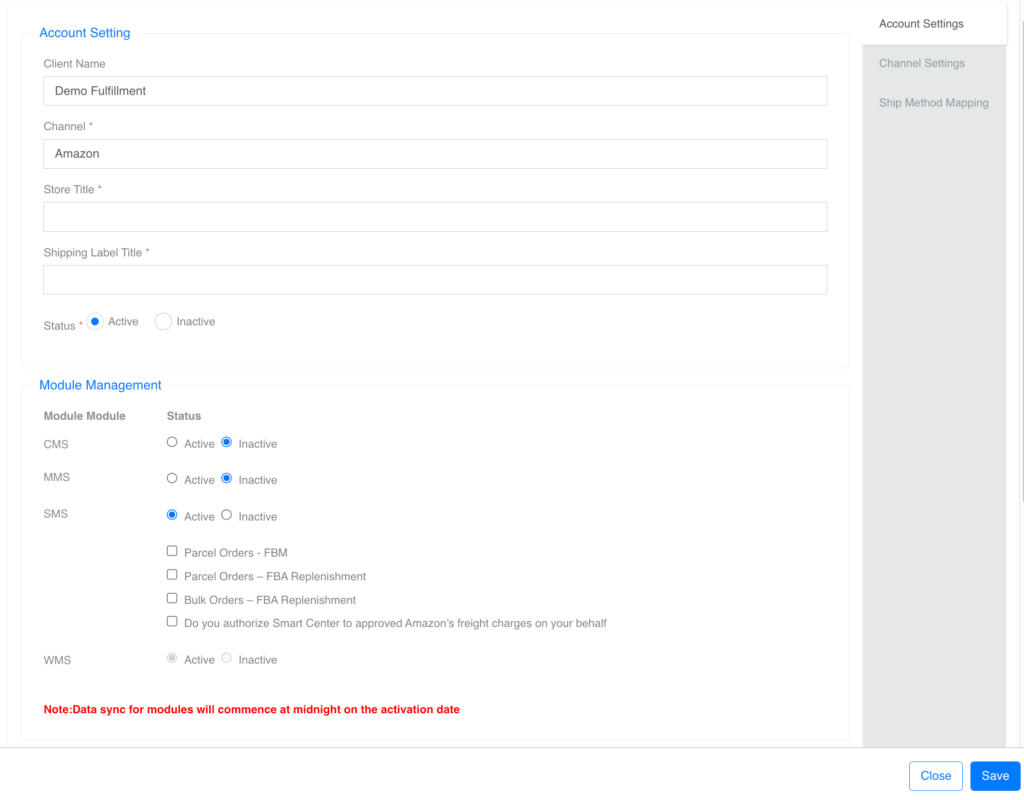
– Select the store you want add configure the setting:
-
– Parcel Orders – FBM: Check this box if you want the system to auto pull FBM orders into the system
– Parcel Orders – FBA Replenishment: Check this box if you want the system to auto pull the Non-Amazon Partnered Small Parcel (Amazon SPD). Once the order is downloaded into the Parcel Order Section, we will do the following:
-
Pick, pack and generate the shipping label
-
Request the carton label from Amazon
-
Attached both labels to the boxe(s) and ship the order out
-
– Bulk Orders – FBA Replenishment: if you want the system to auto pull the following orders into the bulk order section instead of you manually entering them, check this box:
-
– Amazon Partnered – LTL Shipment (AP – LTL)
-
– Amazon partnered – Small Parcel Shipment (AP SP – UPS)
-
– Non-Amazon Partnered – LTL
-
– If you want the system to auto confirm/approve the shipping charges for Amazon Partnered – LTL Shipment (AP – LTL), be sure to check the “Do You want to authorize Smart Center to approve Amazon’s freight charges on your behalf”. When you check this box, we will auto pull the BOL, if you do not check this box, be sure to go into your Amazon store to approve the charges so we can pull the BOL
-
– Once you are done with these settings, be sure to head to MMS > Channel Product and map all your SKUs to the channel. If not, your orders will not download
Note:
-
– Be sure that you have enough inventory before creating the replenishment order, your order will NOT download if your current inventory is short
-
– ONLY orders in “Working” Status on Amazon will be downloaded
-
– Be sure that your “Ship from Address” has exactly “1720 Dan Kipper Drive” otherwise orders will NOT be downloaded, because we do NOT want to download orders shipping from your other warehouse(s)
-
– Orders are downloaded every 30mins. Once an order is downloaded, it CANNOT be modified/changed and do NOT change the “Shipping Service” from Amazon as this may cause issues with the API communication
-
– Once an order is downloaded, you will need to do the following:
-
– Non-Amazon Partnered – LTL: Head to the “Shipping Details” page, enter the “Number of Boxes” and save. This required for us to be able to pull the carton labels from Amazon
-
– Amazon Partnered – LTL: Head to the “Shipping Details” page, select the “Shipment Class” and save. This required for us to be able to accept Amazon’s shipment charges on your behalf and pull the BOL
-
– If you cancel an order in Smart Center before it’s started, it will NOT cancel in Amazon and vice versa.
-
– When you create an order, be sure to generate the carton labels (In Amazon). You do not need to load it in smart Center, but it needs to be created in Amazon so the system can pull them in
-
– Once an order is in READY status, the system will pull the pallet labels and BOL (For Amazon Partnered LTL)
-
– Click on the “Instructions for linking Amazon Account” on the channel settings top right tab and follow those steps to complete the configurations
-
– Click on Test Account to see if you entered the correct information
-
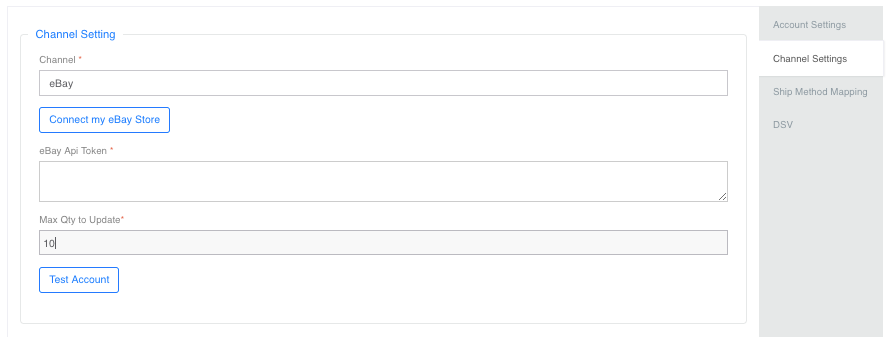
– Click on “Connect my eBay store” this will take you to eBay to log in, wait for it to bring you back to Smart Center and populate the eBay API token for you
-
– Max Qty to Update: Because different sellers have different selling capacity, its important that you (seller) knows how much you can sell. To estimate this, take the total qty you can sell and divide that by the number of SKU you have on eBay. The results rounded up to a whole number will be the max you can sell if you are to send all your products into eBay. My system will use this number to update the inventory every 30mins to keep your products from going down to ZERO.
-
– Click on Test Account to see if the information entered is correct
-
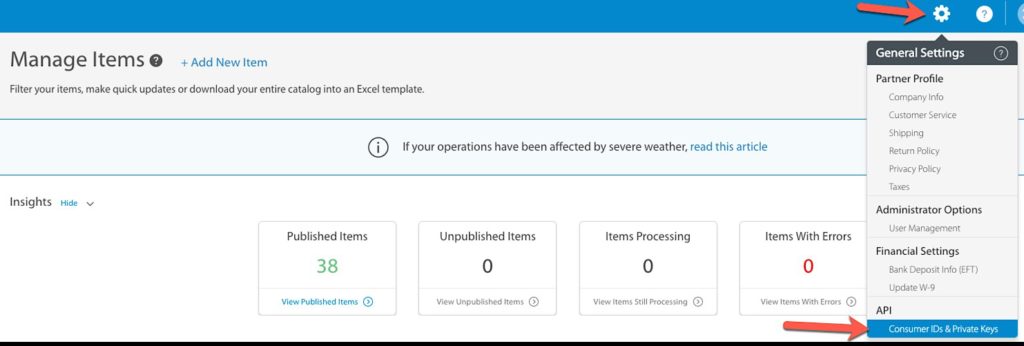
– Log into your Walmart store and go under Settings and click on Consumer IDs & private Keys
-
– Be sure NOT to click on the “Add a new key for a solution provider“, instead you want to be sure that you can do a “Direct integration method“

-
– If you are not able to create API keys for direct integration, you can request it by following Walmart’s outlined Q&A below.
Q: If I don’t like the Solution Provider I’ve chosen, can I switch to a different one? And can I decide to perform direct integration in the future? Would those changes affect my account?
A: Yes, you can switch to another Solution Provider or opt to use our direct integration method. This will not have any impact on the status of your account. To change your integration method, create a case for Partner Support via Seller Center and choose Partner Account/Profile – Working with a Solution Provider and a member of our Partner Support team will process your request.
Q: How do I notify Walmart that I’d like to change Solution Providers?
A: If you would like to change Solution Providers, create a case in Seller Center with the following fields:
Issue Category: Partner Account/Profile
Sub Category 1: Working with a Solution Provider
-
– Once granted, you should be able to continue to the steps below.

-
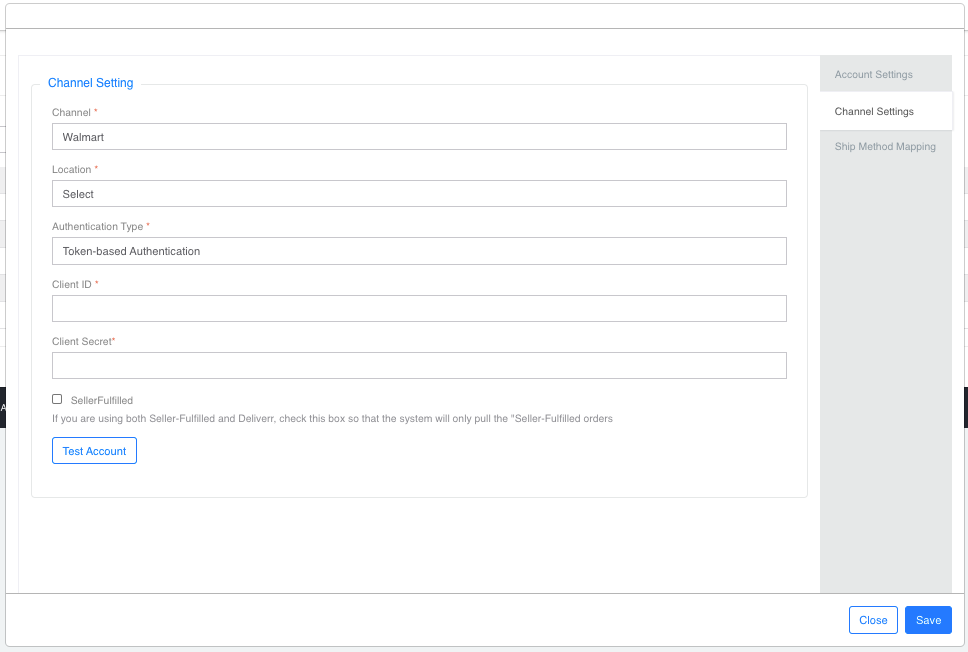
– Copy the 2 data sets into Smart Center, click on “Save” then “Test Account”
-
– Channel Type: This will be “Pass” under the note section
-
– Click on Test Account to see if the information entered is correct

-
– User ID: this will be the API User from Jet
-
– Password: This will be the Secret from jet
-
– Click on Test Account to see if the information entered is correct

-
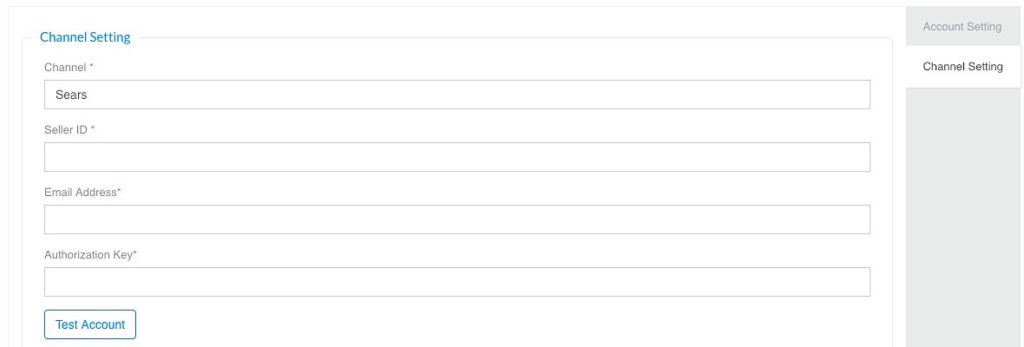
– Copy the Seller ID
-
– Click on the “Account Info” and scroll down to API Authorization Key and click on the to get the key
-
– Seller ID: this is copied from the above
-
– E-mail Address: This is the e-mail address associated with your seller account
-
– Authorization Key: This is also copied form the “Generate New Key” you clicked
-
– Click on the “Instructions for linking Shopify Account” and follow those steps
-
-
– To get the info you need, please create a ticket from you Wayfair account and tell your rep that you want to use a 3rd party platform to get order and update inventory. Dont forget to use my email address as the Technical help so I can take over the conversation.
-
– Ship Method Mapping: This is for Shopify market place ONLY, if you are offering expedited shipping service levels that you want to map in 1Smart Center so the warehouse ship all orders according to the preferred service type, then use this to control that. It is important that you copy the “Client Shipmethod” exactly as you have it in Shopify, then select the appropriate carrier and service you want it mapped to

-
– DSV: This is for drop shipping channels like Amazon Vendor Central, Wayfair. Unless you are doing these 2 channels, you can ignore this setting

Next: Settings – b.4 System Settings – Warehouse View/Setup>>
[Table of Contents]


