<<Previous: FMS – a.2 Buy Plan – Template
Go to WMS > Inventory Product > Bill Of materials tab to see the settings below.

-
– Select a product, put the quantity needed then click on “Add” to create a list of BOM. You can add as many SKU as you like to build the kit
-
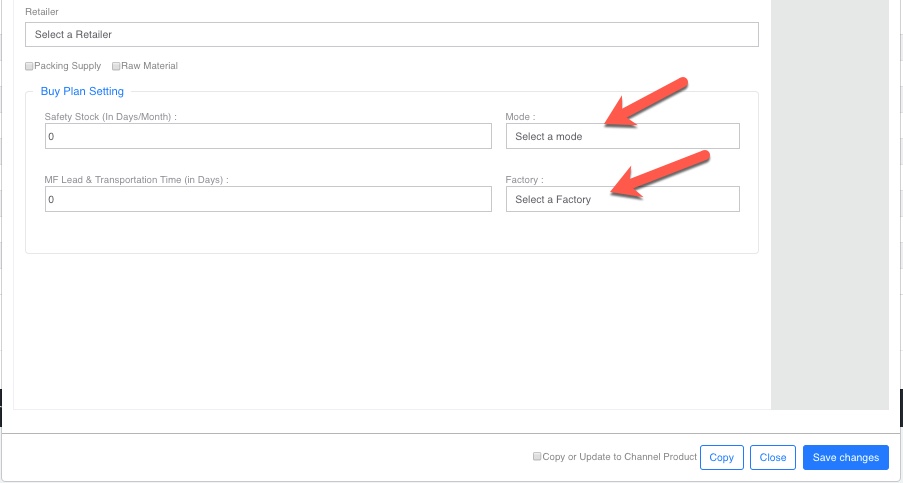
– On the “Product’s Basic Info”, do not forget to populate these 2 fields below. Its the ONLY way you can find the SKU under the following steps below
-
– Once you finish creating your BOM for all the SKU’s you can then go to the FMS module for the steps below.
This is where you can come to see all the SKUS with “(BOM)” also known as bill of materials. These steps will take you to this screen below:
-
Go to the FMS Module
-
Click on “Production” then “Bill of materials”

-
– Factory/Mode: These fields comes from the Inventory Product table
-
– Last Produced: Display the most current date that a WO was “Completed” if none is applicable, just leave it blank
-
– # of BOM lines: This data will count the number of SKU(s) from the BOM table under the Inventory Product table
-
– Current Inv: This will sum up all the total “Sellable” inventory level at the Factory/Warehouse
-
– Create WO: You will need to check the box next to the SKU or SKU’s you need to create a WO for. This could be multiple or single SKU at once for the SAME Factory ONLY. You CANNOT create a WO for “Outsourced” products. You will be taken to the page below when you click on the “Create WO”

-
– WO Number: this will be auto generated number
-
– SKU: this is also a hyperlink, you can click on it to see the BOM, click it again to make the pop-up disappear
-
– Factory: Select a factory; ONLY one factory can be selected per Work order.
-
– Date Created: this is auto created based on the current date
-
– Date Expected: Select the date you want it completed. Note that you should give the warehouse at least a week to complete the work order
-
– WO Status: All new WO will be in an Open Status
-
– Date Finished: This is auto created based on the current date that the WO is is completed
-
– Max Available: This will look at the how many kits can be built for a master SKU by looking at the inventory available for the components. Inventory for the components CANNOT be
-
– In location marked as “Receivable”
-
– Qty Needed: Enter the quantity you want to produce. You CANNOT enter more quantity than the Max Available
-
– Use the Add or delete to control the SKU within the WO
-
– Print WO: This will print the WO
-
– Save: Dont forget to save the WO. When a WO is saved, it stored in the Work Order Schedules
-
– Start WO: When the users click on this, the WO status change to IN PROGRESS and will auto commit the inventory for the components. If you want to release the components, click on “Cancel”, this action is irreversible and will cancel the work order. See the Work Schedule specs for more information. ONLY a warehouse employee can “Start” a WO
-
– Complete WO: This will close out the work order, adjust out the inventory for the components from the location with the lowest inventory first and put the completed products in FC00-00-00 location with inventory type “Sellable”. ONLY a warehouse employee can perform this function
-
– Close: Close the window
Next: FMS – b.2 Production – Work Order Schedule(s)>>
FMS
a.1 Buy Plan
a.2 Buy Plan – Template
b.1 Production – Build of Materials
b.2 Production – Work Order Schedule(s)
[Table of Contents]


